Posts

Showing posts from April, 2014

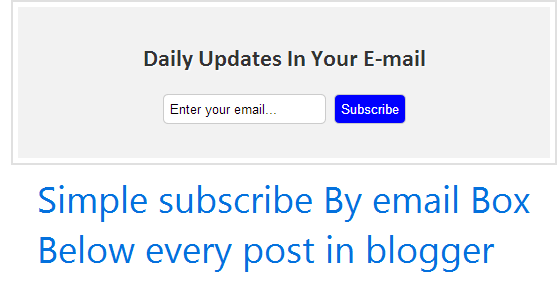
Add Email Subscription Box Below Every Post in blogger
Image
E-mail subscribers are the easiest way to increase your blog traffic. This also reminds your users of every new post you wrote on your blog. Today you will learn how to add e-mail subscription box below every post in blogger. Email Subscription Box Below Every Post in blogger : Steps  Step 1: Login to your blogger dashboard. Step 2: Go to  Template > Edit HTML option. Step 3: Search for <div class="post-footer-line post-footer-line-1"> Step 4: Paste following code just below it and save the template. <style> .subscribebox{width:500px;background:#f2f2f2;padding:20px;margin:auto; text-align: center; font-family: 'Prata', serif; text-shadow: 1px 1px 1px #FFF; background:); padding: 1em; outline: 2px solid #E0E0E0; outline-offset: 5px; font-family:calibri;} </style> <b:if cond='data:blog.pageType == "item"'> <div class='subscribebox'> <h2 style='text-align:center;c

Add Facebook Like and Share Button to Every Post in Blogger

Image
Facebook like and share buttons make easy to let your content to be shared by facebook users on their walls. This also helps you increase your social media traffic.Today we will learn how to add a facebook like and share button below or above  every post of blogger. Facebook Share and Like Button Below Every Post Login to blogger account Go to Template &gt; Edit HTML Now in the blogger template editor search for  < data:post.body/> Just below paste this code : <iframe src="//www.facebook.com/plugins/like.php?href=https%3A%2F%2Fdevelopers.facebook.com%2Fdocs%2Fplugins%2F&amp;width&amp;layout=standard&amp;action=like&amp;show_faces=true&amp;share=true&amp;height=80" scrolling="no" frameborder="0" style="border:none; overflow:hidden; height:80px;" allowTransparency="true"></iframe> If you want to add it above the posts just paste it before < data:post.body> Now you and y

Display Labels Below Every Post in Blogger

Image
Labels are beautiful way to categorize your blogger posts. Labels are very good way to let user see your older posts from the same label. Today you will learn how to display labels below every post in blogger. Adding Labels Below Posts in Blogger Login to blogger account Go to Template > Edit HTML Now in the blogger template editor search for   <data:post.body/> Just below paste this code : <style>.post-labels { float:left; font-size:14px; color:#555 } .post-labels a { color:#111 text-decoration:none; } .post-labels a { text-decoration:undeline; }</style><span class='post-labels'> Posted in <b:if cond='data:post.labels'>           <b:loop values='data:post.labels' var='label'>             <a expr:href='data:label.url + &quot;?&amp;max-results=10&quot;' rel='tag'><data:label.name/></a><b:if cond='data:label.isLast != &quot;true&

How to Display Author Name Below Every Post in Blogger

Image
Author name acknowledges the person who has written that blog post. In a blogger blog you can have upto 100 authors per blog . You can automatically display who has written the post by following this simple tutorial. Blogger/BlogSpot collects the data of the author from their blogger profile in case you have not connected your Google+ account with Blogger. If one haven't connected their profile to google+ then they can change the name of their blogger account easily. Whenever that author will publish a post, this display name will appear as the name of the author. Adding Author Name Below Posts in Blogger Login to blogger account Go to Template > Edit HTML Now in the blogger template editor search for  <data:post.body/> Just below paste this code : <span class='tfauthor'> Post By: <a expr:href='data:post.authorProfileUrl' title='posted by'> <data:post.author/></a>  </span><style> .tfauthor a { t

Chitika Review 2014

Image
In this post of our advertising network reviews we will now take the strongest adsense alternative i.e. Chitika. What Is Chitika Chitika is an online ad network . Chitika was founded in 2003 . Chitika is delivering advertiser & publisher solutions for mobile, search & local. It is the trusted and high-paying ad network.Chitika offers a new, never seen before CPC (Cost Per Click) product orientated program on the advertising market aimed mainly at bloggers. Chitika Ad Types Chitika offers both display and text ads, below is list of main ad types. Text Ads,In-Text Ads,Hover Ads Display Ads List Unit Mobile Ads Chitika Sign-up & Approval (Requirements) Chitika is open for all small to large sites. even new websites can apply for there program. They does not have strict sign-up requirements and also do not take much time to approve .Best ads are shown to Chitika premium members (websites with high or quality traffic) . Sign-up Now Chitika Payment Terms & Meth

Redirect Blogger 404 (Page Not Found) Error Page To Homepage

Image
A 404 error page is displayed when there is no content to display, the content of that page have been moved elsewhere or the url is misspelled. The 404 error page shows your visitors and search engines that their is no page to display and it displays a message something like "Sorry, the page you were looking for in this blog does not exist". This will make a bad impact on your traffic to solve this you can use this tutorial to redirect blogger 404 not found page to homepage. Redirect Blogger 404 Error (Page Not Found) To Homepage Go to blogger DashBoard login >  select your blog and then go  to Settings > Search preferences > Custom Page Not Found. Edit this field and paste the following code  Sorry, the page you're looking for does not exist. You will be redirected to homepage in 5 seconds. <script type="text/javascript"> BSPNF_redirect = setTimeout(function() { location.pathname= "/" }, 5000); </script>

Disable Comments on Blogger Pages

Image
Every blog have some pages like - about, contact and privacy policy. Blogger by default enables comments for pages. But, none of the users will be interested in posting comments on your blogger page and it also doesn't look professional. So i will show you how to remove or disable blogger comments on pages. How to Disable and Remove Comments on Blogger Pages  The steps you need to follow are to login into your blogger account.  Go to Pages >> Options >> under “Reader comments” and you will find their following three options: Allow:   Show comments in pages(it is default) Don't allow, show existing:  Checking this will not allow comments in pages, but will display the previous comments. Don't allow, hide existing:  Checking this will not allow comments in pages, hide the previous comments too. Select “Don't Allow” as your option and Press “Done”, ALSO READ :  How to Disable Anonymous Comments on Blogger ?   If you have any doubt or nee

How To Change WordPress Login URL

Image
Your WordPress login url is the address from where you.and other users can login to your WordPress blog. Today i will show you how can you change your WordPress login address by editing the .htaccess file. Why you should change wordpress login URL For security - less chances of getting your WordPress blog hacked.All WordPress sites have a default login URL of /wp-login.php and also have admin as their default administrative username. So it’s quite easy to attack your WordPress login URL using tools like brute force to guess all the possible passwords for the admin username. For multi-user site - If you have a multi-user site all users will find a simple login URL For easy access - you can remember your easy login address like: example.com/login Changing WordPress Login URL I am going to show you how to change the default WordPress login URL from http://www.example.com/wp-login.php to http://www.example.com/login using htaccess file. Just Open and edit the .htaccess file in the ro

Google Adsense And Subdomains

Image
Can i get Google Adsense  account with subdomain ? Can i use Adsense ads on subdomains ? Many people are asking this type of questions . Let me explain subdomains and Adsense. What is a Subdomain A subdomain is a domain name that is part of a top level domain. For example: Blogspot.com is a top level domain and google.blogspot.com is a subdomain. Subdomains can be two types which are subdomain from own domain and subdomain from third party domain. Subdomains provided by Blogger , WordPress and other free hosts are subdomains from third parties and subdomains created on your own domain are own subdomains. Quick Tip:  it’s not advisable to go for adsense with a “SubDomain”. It will be better for one to acquire a “Top Domain” first before applying for adsense. Adsense Account and SubDomains If you already have an approved Google Adsense account: Then you can use adsense ads on your own subdomains without any hassle. But for using adsense ads on third-party subdomain

Google Adsense Review 2014

Image
When we talk about make money blogging  the first advertising network come in our mind is Google Adsense. Google Adsense is the giant of display and text advertising(contextual advertising). Google Adsense is the largest, popular between publishers and advertisers advertising and publishing ad network. Google Adsense Review For Publishers Publisher Requirements Traffic Requirement: None, When applying for Google Adsense you don't have to worry about your weblog traffic. Language Requirements:    Your Blog Or Website' s content must be primarily in one or more of these supported languages: Arabic, Bulgarian, Chinese (simplified), Chinese (traditional), Croatian, Czech, Danish, Dutch, English, Estonian, Finnish, French, German, Greek, Hebrew, Hungarian, Indonesian, Italian, Japanese, Korean, Latvian, Lithuanian, Polish, Norwegian, Portuguese, Romanian, Russian, Serbian, Slovak, Slovenian, Spanish, Swedish, Thai, Turkish, Ukrainian, Vietnamese Domain/Website Age Requirement

How To Make Money Blogging

Image
Is making money online one of your dreams. Then it;s no more a dream. Today i am sharing the ways you can make money blogging on Blogger , WordPress or any other blogging platforms . check out these 4 fairly easy ways to starting making money from your blogging efforts. 1. Joining Advertising Programs There are plenty of advertising programs that let you earn money through your blog, Like google adsense, chitika, Infolinks etc... Advertising Programs are the most popular way to make money blogging. 2. Affiliate Programs Affiliate programs let you allow selling there products, or making signups on their website through your blog and they pay you commissions. This is a very popular way to make money blogging. 3. Sell Direct Ads You can sell direct ads on your blog to interested advertisers. Many sites like BuySellAds let you sell adverts on your blog. Thus you can control which ads are being displayed on your blog and how much the advertisers pay you. Quick Tip:  The

7 Best Free Blogger Templates

Image
Blogger is very good blogging platform, from newbies to masters every type of persons use this. Templates make a website look good and let users to navigate easily.  Today i am sharing 7 best free blogger templates. Templates below are good for all types of websites but they are specially useful when you use them for magazing/news blogs. EvidBT Professional Blogger Template Responsive design : EvidBT is responsive, which means it supports the majority of screen resolutions. You can always preview responsive designs using our responsive design testing tool. New Mashable Blogger Template Another cool mashable style blogger template. New Mashable blogger template is designed for technology blogs, We try out best to give this theme unique and professional look, by looking at name of this theme you will think that this template is copy of famous technology blog mashable.com , but I want to clarify that this theme is codded by us and we don't use a single line of code o

10 Ways To Increase Blog Traffic

Image
There are millions of blog's now and blogging is becoming very popular day-by-day. How do you attract visitors to your blog? Follow these simple ways to drive traffic to your blog. Tips To Increase Blog Traffic 1. Write Frequently You should often update your blog. Frequently updated blog is the first step towards making more traffic and page views. 2. Write Quality Articles Quality is always considered better then quantity, even if you don't write too much just write full and quality articles. 3. Enable RSS Feeds Many people use RSS feeds to read the content, so don't forget to enable RSS feeds for your content. 4. Email Subscriptions Email Subscriptions are must for every blogger, This increases your blog traffic especially if you have particular niche site. 5.. Tag and Label your posts If you are using  WordPress  then use the tag function or else if you are using Blogger  then label your posts with relevent keywords. 6. Guest Blogging Guest blog

5 Responsive Magazine Style Blogger Templates

Image
Today I am going to share free, responsive, magazine style blogger templates. Blogger is one of the best places to make a NEWS, Multimedia website and the templates i am going to share are responsive, so they make your website fit to any screen size. Below are 5 cool responsive blogger templates, Enjoy !!! Vortex Blogger Template Vortex is a premium looking free blogger template. Vortex is 100% responsive, high functioning and multimedia blogger theme.Vortex is 100% responsive, high functioning and multimedia magazine style blogger template designed for richly professional bloggers and webmasters. It has some efficient features and functionalities that would certainly make you go gaga about this template. Most importantly, this template looks different on each and every device. Flat Mag Flat Mag Responsive Blogger Template is a multi-purpose straight Blogger template precisely designed for multimedia, news bulletin, Entertainment and Technology blogs. With elegant green

Adding a Floating Drop Down Menu In Blogger With Search Box

Image
A drop down menu is something that contains navigation URl's of your blog and making it easier to find the content users are looking for. A floating element is something that sticks to your blog at the place you post it and scrolling doesn't affects it position. Today I am sharing a drop down menu for blogger with search box. Adding Floating DropDown menu to blogger Login to your blogger dashboard. Select your blog. Select Template . Click Edit HTML.  Add this code just above the body tag <style> #naviopdropcont{   width:100%;   height:45px;   display:block;   padding:0;   margin:0 0 20px 0;  z-index:100;   top:0px; left:0px;  position:fixed;     box-shadow:2px 2px 5px  #444444; -moz-box-box-shadow:2px 2px 5px  #444444; -web-kit-box-shadow:2px 2px 5px  #444444; -goog-ms-box-shadow:2px 2px 5px  #444444; background:#000; } #naviopdropnav{   float:left;   width:800px;   height:40px;   display:block;   pad

How To Embed Google+ Posts In Blogger

Image
Google+ is becoming a popular social network day-by-day, and especially most of the bloggers now use google plus as one of their daily used social networks. If you are a Google+ user and post updates on your Google+ profile frequently then this tutorial is straight away for you. With embedding your google+ post on blogger you can get more +1's on your blog. Users can follow you on Google+, add comments to your post and also share it without leaving your awesome blog. Embedding Google+ Comments In Blogger Step 1: Go to any Google+ account from where you want to embed the post in your blog. Step 2: Go to the post which you want to embed in your blog(for this click on the timestamp link). Step 3: hover the mouse pointer on down arrow above post title and Click on it. Step 4: A dropdown menu will appear with many options. Step 5: Choose Embed post option from the list of option.           Step 6: Now a code will appear in a box copy this code. Step 7: Now go to

How To Add Google Translate To Your Blogger Blog

Image
Many of the users of blogger are blogging about the content that can be used worldwide and not just in the area they live, but we live in a world where in every 10 miles languages change(not a fact, just a saying) . So to make your blog be usable and readable by the worldwide audience you may use a free service provided by Google , Google Translate. What is Google Translate Google translate is a web service provided by google for normal users as well as webmasters to traanslate their website content in the language end users want. Adding Google Translate To Blogger First thing you have to do is go to Google Translate website , then click on website translator link at the bottom. Then click on  Add To Your Website Button. Now fill up the form and in the next step you will have two options Translate all languages : this will display a list of all available languages on Google Translate to your user to translate into. Specific languages: this will add your chose

How To Add Popular Posts Widget To Blogger

Image
Popular posts, as it's name suggests shows your visitors your most popular blog posts name's and links to them. Adding his widget is very simple and cool and it has lots of benefits. This gadget shows which are the most visited blog posts on your blogspot blog, and you can set it to display the info you want in four possible combinations: (1) only the title of the post, (2) a thumbnail of the image and the post title, (3) post title with a summary, and (4) post title with a thumbnail and a post snippet. Why You Should Add A Popular Posts Widget Increase Your Pageviews: Showing your users what everyone is reading is a good idea to increase your pageviews. Higher Income: If you are monetizing your blog increased Page Views can increase your earnings too. Adding Popular Posts Widget To Blogger adding one is a great idea, is'nt it ? let's start the tutorial - Go to Blogger dashboard and sign-in and choose the blog from list. Go to Layout and look f

5 WordPress Plugins To Kickstart Your New Blog

Image
So you have just set up your  WordPress  blog and now want to add some cool plugins to it. Today we are going to share 5 awesome plugins to supercharge your new WordPress blog. The plugins we are sharing below are some most essential plugins for wordpress bloggers of the new generation. it’s extremely difficult to find the best WordPress plugins as there are over 30,000 plugins available in the WordPress Plugins Directory. We've tried to give you best 5 WordPress plugins for newbie bloggerss for WordPress. You may not use too much plugins on your wordpress site as they may slow down your blog, Most Essential 5 WordPress Plugins We are giving you all the essential 5 wordpress plugins. 1. Jetpack by WordPress.com Jetpack is a super-plugin that brings the power of WordPress.com cloud to your self-hosted WordPress Blog. You need a WordPress.com account to enjoy all the features of this plugin. It’s a must-have with over 25 unique features to turbocharge your blog like Free Con

How To Disable Anonymous comments in Blogger

Image
With comments users can express what they feel about your blog post and comments are essential part of each and every blog. Blogger also provides it's own commenting system for users to let comment on a blogger blog.By default Blogger allows anonymous comments, Using this any person can comment without giving any info about him/her(even not the name). Anonymous commenting means nothing but allowing strange, unregistered users to comment on your blog without logging in. Anonymous commenting is mostly used by spammers for posting spam links on your Blogger blog. Thus you must disable anonymous comments on your blogger blog to be safe from spam. Disable Anonymous Commenting in Blogger 1. Go to Blogger Dashboard > Settings > Posts and Comments. 2. Under the comments subheading, you will find an option saying 'who can comment?' There will be these 4 options to choose. Anyone: Anonymous commenting is allowed(Anyone can comment) Registered users: only

How To Add Meta Description To Blogger ?

Image
So, what you are blogging about on your Blogger blog? Describing this in 150 characters is called Meta Description . Meta description is also displayed on search engines below your Blog link. Meta descriptions are invisible to visitor on your blog but are crawled by search engines. Meta descriptions play an important part in Search Engine Optimization( SEO ) of your Blogger blog. How To Add Meta Description To Blogger  The first thing you have to do is going to your Blogger dashboard and from there, go to Settings > Search  preferences > Meta Tags > Description and click on Edit Meta Description. The screenshot below defines how will it look: How To Add Meta Description To Individual Post On Blogger  Its as easy as you can do it in 5 seconds, Just go to Blogger dashboard then go to the post or page you  want to edit and click on the Search Description setting, and there you enter the text and save by clicking  the Done button. Now you are done adding Meta Descriptio

Add Stylish CSS3 Search Box To Blogger

Image
A search box helps your visitors find the information they are looking for easily and quickly. Most of users coming from search engines or landing at your homepage will want to search the information on your blog and they will need a search box. Today we are giving you a beautiful, responsive CSS3 search box for your Blogger blog. This search box will surely force your visitors to try a search on your blogspot blog. This search box is responsive and even works on non CSS3 supported browsers. How To Add Search Box To Blogger: 4 Steps 1. Go to Blogger Dashboard and select the blog to which you want to add the search box 2. Now click on Layout tab and add a new gadget in sidebar (or wherever you want to add it) and select HTML/Java Script for the gadget 3. Now paste the below code,  name the Title as Search or any other text(you can also leave it blank). <style>.searchform { display: inline-block; zoom: 1; display: inline-block; border: solid 1px #d2d2d2;

Display the Last Updated Date of Your Posts in WordPress

Image
Wordpress is used by millions of  bloggers for many purposes, Many NEWS site's also use wordpress, If you have a NEWS WordPress blog whenever you update a news post you might also want your users to get the date updated on your post. In this tutorial we will share how you can let your users know that the post was updated. We will highlight how to display the last updated date of your posts. For example, if you posted an article on May 9, 2014, and you found out three days later that there was an update to the story. You can just edit the article, and it will show May 12, 2014 at the timestamp for last update. First you need to open and check all these these files: index.php single.php page.php Then you will need to find the following code: <?php the_modified_time('F jS, Y');?> Replace the code above with : <?php $u_time = get_the_time('U'); $u_modified_time = get_the_modified_time('U'); if ($u_modified_time >= $u_time + 86

5 Beautiful Dark Blogger Templates

Image
Are you tired of looking at the default templates that Blogger provides? We decided to search for some of the different-looking beautiful dark Blogger templates and found these 5 cool dark blogger templates. Eclipse Dark theme that brings werewolves to mind. An enchanting template for the dark souls.Theme is designed beautifully with extra dark colors and glitter. Limax Another beautiful dark blogger template with striking colors. Butterfly Magic Another dark colors collection in this butterfly nagic blogger theme Xenon Xenon is a free dark blogger template adapted from WordPress with 2 columns, left sidebar and posts thumbnails. Cooperate Cooperate is a free blogger template adapted from WordPress with 2 columns, right sidebar, slideshow, social bookmarking icons, posts thumbnails, tabs, drop down menu and a background pattern. Excellent layout for blogs about any general topic. So we have given you 5 Cool Dark Blogger Templates, Now it;

How To Style Blogger Blog Date Header

Image
Hello Blogger's today i am sharing a trick with you  on how to add cool CSS style to your BlogSpot blog date header. What we are going to do in this tutorial is changing the Blogger date header background color with some simple CSS adjustments that will make the date header to float on the left side of your post and to be partially out of the structure like a banner with a colorful appearance.  Customize Blogger Blog Date Header Step 1: Login to blogger dashboard with your Email and password. Step 2:  go to Template > Edit HTML Step 3: Click anywhere inside the text area where the code is and search (using CTRL + F ) for the following code: .date-header span Step 4:  Below this you may find the code above .date-header span { background-color: $(date.header.background.color); color: $(date.header.color); padding: $(date.header.padding); letter-spacing: $(date.header.letterspacing); margin: $(date.header.margin); } Step 5:  Now replace this type of co