Posts

Force Users To Login Before Reading Posts in WordPress

Image
Some WordPress CMS users might want to force users to Login before they read posts. So we have h simple tutorial for them. WordPress has a built-in function which can help you to do that. The function auth_redirect() , this is how it works: When it is called from a page, it checks to see if the user viewing the page is logged in. If the user is not logged in, they will be automatically redirected to the login page. The user is redirected in such a way that, upon logging in, they will be sent directly to the page they were originally trying to access. By using this function, we can implement below code that check if post is restricted or not, and redirect users to login page if needed. Just paste the following code into your theme’s functions.php file: function tf_force_login() { global $post; if (!is_single()) return; $ids = array(188, 185, 171); // array of post IDs that force login to read if (in_array((int)$post->ID, $ids) && !is_user_logged_in()) { a...
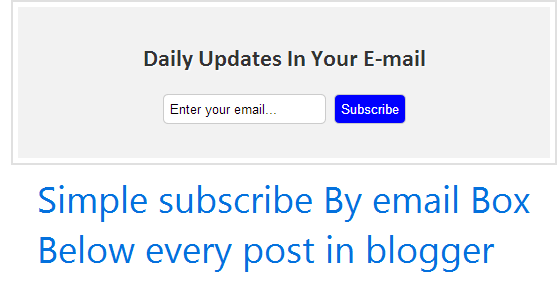
Add Email Subscription Box Below Every Post in blogger

Image
E-mail subscribers are the easiest way to increase your blog traffic. This also reminds your users of every new post you wrote on your blog. Today you will learn how to add e-mail subscription box below every post in blogger. Email Subscription Box Below Every Post in blogger : Steps  Step 1: Login to your blogger dashboard. Step 2: Go to  Template > Edit HTML option. Step 3: Search for <div class="post-footer-line post-footer-line-1"> Step 4: Paste following code just below it and save the template. <style> .subscribebox{width:500px;background:#f2f2f2;padding:20px;margin:auto; text-align: center; font-family: 'Prata', serif; text-shadow: 1px 1px 1px #FFF; background:); padding: 1em; outline: 2px solid #E0E0E0; outline-offset: 5px; font-family:calibri;} </style> <b:if cond='data:blog.pageType == "item"'> <div class='subscribebox'> <h2 style='text-align:center;c...

Add Facebook Like and Share Button to Every Post in Blogger

Image
Facebook like and share buttons make easy to let your content to be shared by facebook users on their walls. This also helps you increase your social media traffic.Today we will learn how to add a facebook like and share button below or above  every post of blogger. Facebook Share and Like Button Below Every Post Login to blogger account Go to Template &gt; Edit HTML Now in the blogger template editor search for  < data:post.body/> Just below paste this code : <iframe src="//www.facebook.com/plugins/like.php?href=https%3A%2F%2Fdevelopers.facebook.com%2Fdocs%2Fplugins%2F&amp;width&amp;layout=standard&amp;action=like&amp;show_faces=true&amp;share=true&amp;height=80" scrolling="no" frameborder="0" style="border:none; overflow:hidden; height:80px;" allowTransparency="true"></iframe> If you want to add it above the posts just paste it before < data:post.body> Now you and y...

Display Labels Below Every Post in Blogger

Image
Labels are beautiful way to categorize your blogger posts. Labels are very good way to let user see your older posts from the same label. Today you will learn how to display labels below every post in blogger. Adding Labels Below Posts in Blogger Login to blogger account Go to Template > Edit HTML Now in the blogger template editor search for   <data:post.body/> Just below paste this code : <style>.post-labels { float:left; font-size:14px; color:#555 } .post-labels a { color:#111 text-decoration:none; } .post-labels a { text-decoration:undeline; }</style><span class='post-labels'> Posted in <b:if cond='data:post.labels'>           <b:loop values='data:post.labels' var='label'>             <a expr:href='data:label.url + &quot;?&amp;max-results=10&quot;' rel='tag'><data:label.name/></a><b:if cond='data:label.isLast != &qu...

How to Display Author Name Below Every Post in Blogger

Image
Author name acknowledges the person who has written that blog post. In a blogger blog you can have upto 100 authors per blog . You can automatically display who has written the post by following this simple tutorial. Blogger/BlogSpot collects the data of the author from their blogger profile in case you have not connected your Google+ account with Blogger. If one haven't connected their profile to google+ then they can change the name of their blogger account easily. Whenever that author will publish a post, this display name will appear as the name of the author. Adding Author Name Below Posts in Blogger Login to blogger account Go to Template > Edit HTML Now in the blogger template editor search for  <data:post.body/> Just below paste this code : <span class='tfauthor'> Post By: <a expr:href='data:post.authorProfileUrl' title='posted by'> <data:post.author/></a>  </span><style> .tfauthor a { t...

Chitika Review 2014

Image
In this post of our advertising network reviews we will now take the strongest adsense alternative i.e. Chitika. What Is Chitika Chitika is an online ad network . Chitika was founded in 2003 . Chitika is delivering advertiser & publisher solutions for mobile, search & local. It is the trusted and high-paying ad network.Chitika offers a new, never seen before CPC (Cost Per Click) product orientated program on the advertising market aimed mainly at bloggers. Chitika Ad Types Chitika offers both display and text ads, below is list of main ad types. Text Ads,In-Text Ads,Hover Ads Display Ads List Unit Mobile Ads Chitika Sign-up & Approval (Requirements) Chitika is open for all small to large sites. even new websites can apply for there program. They does not have strict sign-up requirements and also do not take much time to approve .Best ads are shown to Chitika premium members (websites with high or quality traffic) . Sign-up Now Chitika Payment Terms & Meth...

Redirect Blogger 404 (Page Not Found) Error Page To Homepage

Image
A 404 error page is displayed when there is no content to display, the content of that page have been moved elsewhere or the url is misspelled. The 404 error page shows your visitors and search engines that their is no page to display and it displays a message something like "Sorry, the page you were looking for in this blog does not exist". This will make a bad impact on your traffic to solve this you can use this tutorial to redirect blogger 404 not found page to homepage. Redirect Blogger 404 Error (Page Not Found) To Homepage Go to blogger DashBoard login >  select your blog and then go  to Settings > Search preferences > Custom Page Not Found. Edit this field and paste the following code  Sorry, the page you're looking for does not exist. You will be redirected to homepage in 5 seconds. <script type="text/javascript"> BSPNF_redirect = setTimeout(function() { location.pathname= "/" }, 5000); </script> ...